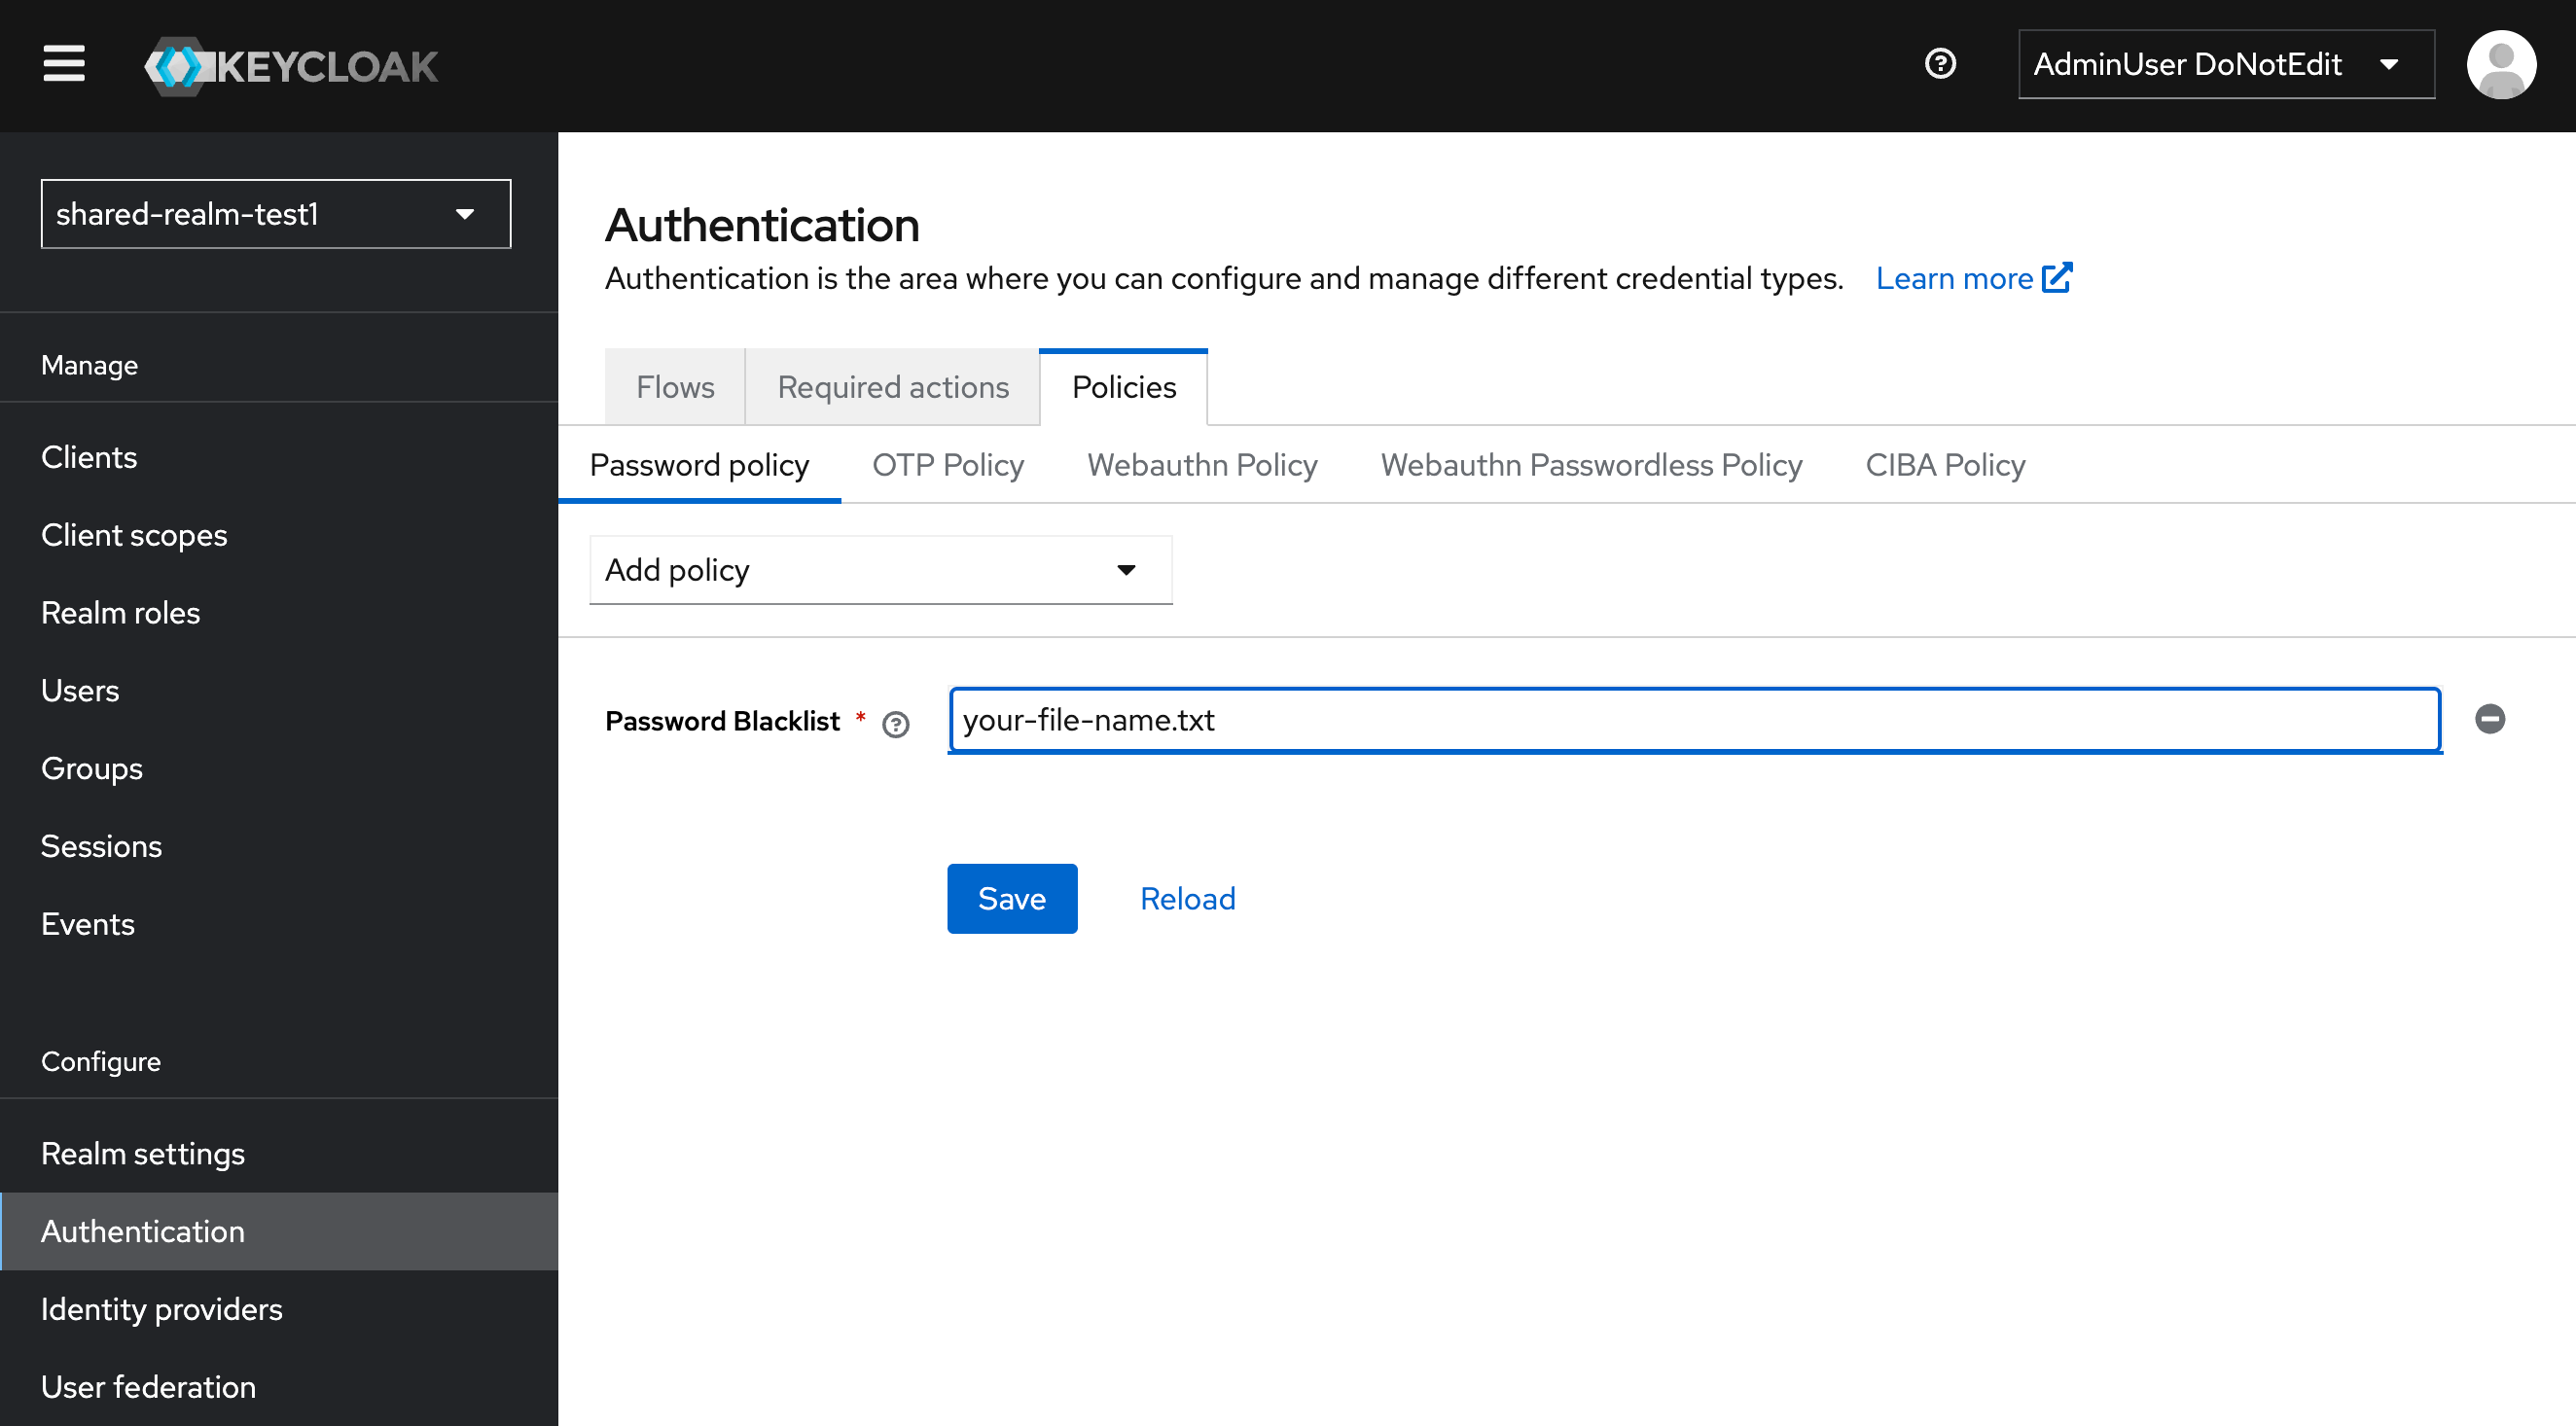
Password Blacklist
Keycloak provides an easy method to add a password blacklist to your realm. This is useful for preventing users from choosing common or compromised passwords. If you don't have a password blacklist, you can use the one provided by Have I Been Pwned.
On a dedicated cluster you can upload and apply your own list yourself — no support request needed. Denylists are available on every tier and are not subject to the theme and extension resource limits.
Uploading and applying your list
Upload the list as a Password Denylist cluster resource and apply it to a realm from the dashboard. See Cluster Resources for the full walkthrough. In short:
- In
Cluster > Config > Resources, click Add New Resource and create a resource of type Password Denylist. - Upload your list as a
.txtfile with one password per line. - Click Refresh Cluster Resources and wait for the cluster restart to complete.
- Expand the resource, click Apply to Realm, and apply it to the realms that should use it.
Your list is deployed using the resource name plus a .txt extension, so a resource named common-passwords becomes common-passwords.txt. You can upload several lists and apply different ones to different realms.
Setting the policy manually
You can also designate the file in the Keycloak Admin Console instead of using Apply to Realm:
- Log in to the Keycloak Admin Console via the Phase Two Dashboard.
- Visit the realm you want to configure. Open the console link for the specific realm.
- Navigate to the Authentication section in the left sidebar.
- Click on the Policies tab and in the dropdown select Password Blacklist.
- Provide the name of the file — the resource name plus
.txt, for examplecommon-passwords.txt. Click "Save" to designate the file.